

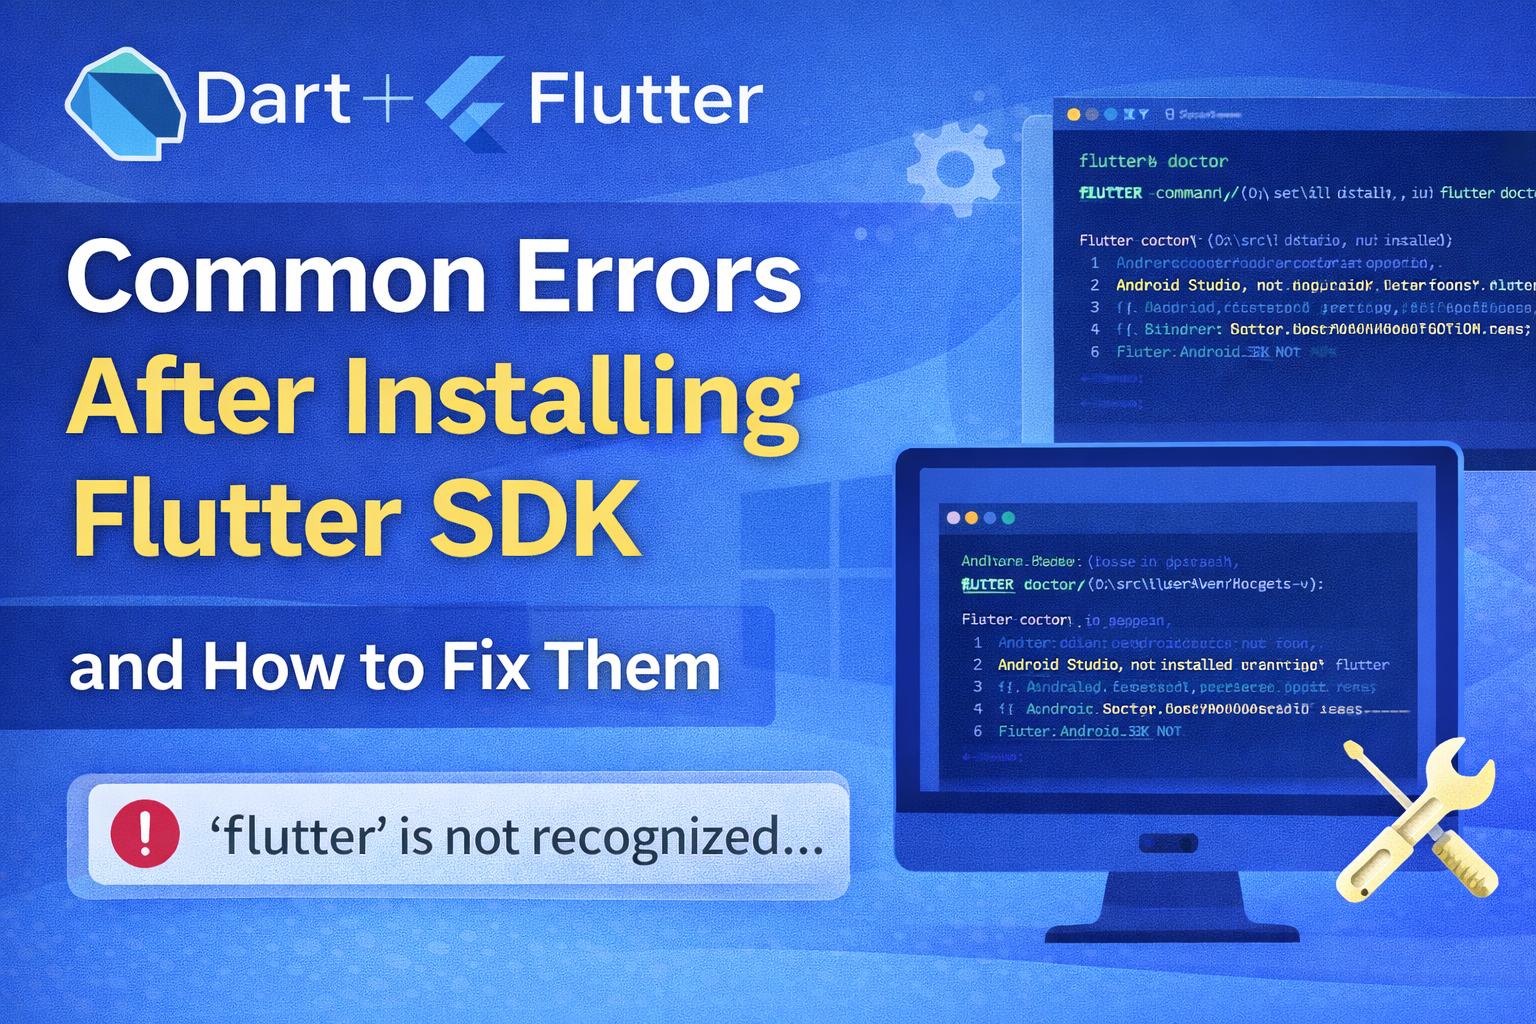
Common Errors After Installing Flutter SDK and How to Fix Them
Flutter has rapidly become one of the most popular frameworks for cross-platform application development. Developers can build high-performance mobile, web, and desktop applications using a single codebase written in Dart. However, many developers face several issues immediately after installing Flutter SDK on their systems.
These common errors after installing Flutter SDK can occur due to incorrect environment setup, missing dependencies, path configuration problems, Android SDK misconfiguration, Gradle issues, or Dart conflicts.
While Flutter installation itself is straightforward, the real challenge begins when developers start running Flutter commands and encounter unexpected errors.
This comprehensive guide explains the most common Flutter installation errors, their causes, and the best solutions to resolve them effectively. Whether you are working on Windows, macOS, or Linux, this article will help you troubleshoot Flutter environment problems efficiently.
Why Errors Occur After Installing Flutter SDK
After installing Flutter SDK, developers often assume the setup is complete. However, Flutter depends on several external components including:
- Dart SDK
- Android SDK
- Java Development Kit (JDK)
- Platform tools
- Gradle
- Device drivers
- Environment variables
If any of these components are missing or incorrectly configured, Flutter commands may fail. Running the flutter doctor command is the first step in identifying these issues.
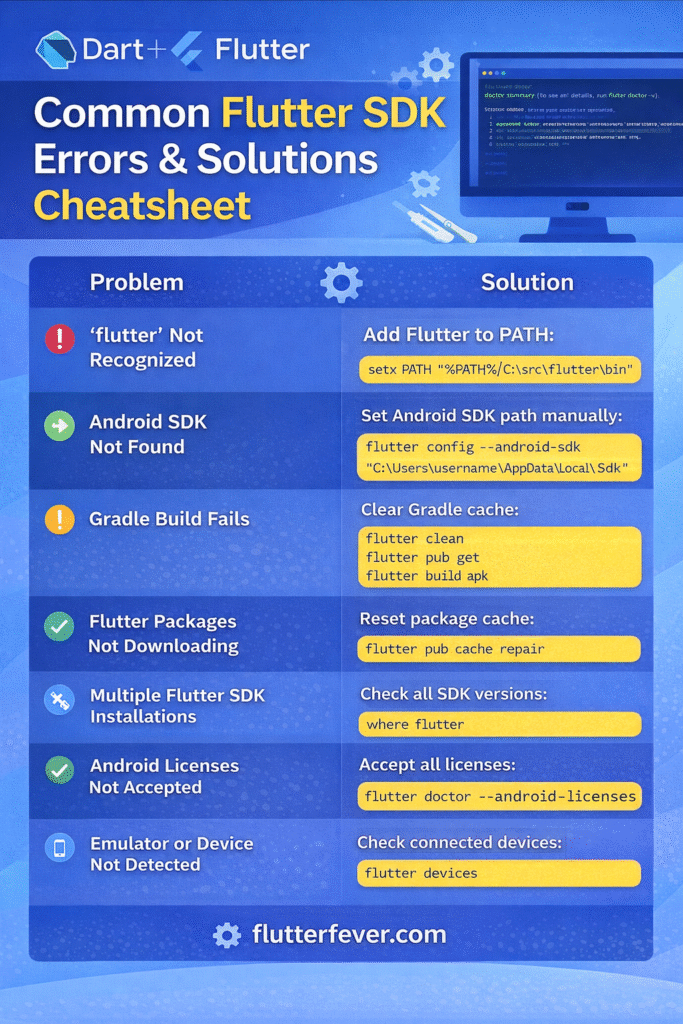
1. Flutter Command Not Recognized
Error
'flutter' is not recognized as an internal or external command
Cause
This error occurs when the Flutter SDK path is not added to the system environment variables.
The system cannot locate the Flutter executable because the flutter/bin directory is not included in the PATH.
Solution
Step 1: Locate Flutter SDK Folder
Example:
C:\src\flutter
Step 2: Add Flutter to PATH
Add the following path to environment variables:
C:\src\flutter\bin
Read : How to Set Flutter Path in Windows (Step-by-Step Guide for Beginners)
Step 3: Restart Terminal
Close Command Prompt or PowerShell and reopen it.
Step 4: Verify Installation
Run:
flutter doctor
If the command runs successfully, the issue is resolved.
2. Flutter Doctor Shows Missing Dependencies
Error
When running:
flutter doctor
You may see warnings such as:
[!] Android toolchain - develop for Android devices
[!] Android Studio not installed
[!] Android SDK not found
Cause
Flutter requires Android development tools to build mobile apps.
Solution
Install the following components:
Install Android Studio
Android Studio includes:
- Android SDK
- SDK Manager
- Emulator
- Platform tools
Download Android Studio and install it.
Read : Android Studio Download and Android SDK Setup steps for Flutter Development
Accept Android Licenses
Run:
flutter doctor --android-licenses
Accept all licenses.
Then run:
flutter doctor
again.
3. Dart SDK Version Conflict
Error
Because project depends on Dart SDK version X.X.X
but current Dart SDK version is Y.Y.Y
Cause
Flutter includes its own Dart SDK. Installing another Dart SDK globally may cause conflicts.
Solution
Use Flutter’s Dart instead of a separate installation.
Check Dart version used by Flutter:
flutter dart --version
Avoid modifying Dart SDK paths manually if Flutter is installed.
4. Android SDK Not Found
Error
Unable to locate Android SDK
Cause
Flutter cannot detect the Android SDK location.
Solution
Set Android SDK path manually.
Example:
C:\Users\username\AppData\Local\Android\Sdk
Run:
flutter config --android-sdk "C:\Users\username\AppData\Local\Android\Sdk"
Then verify:
flutter doctor
5. Gradle Build Failed Error
Error
Execution failed for task ':app:compileFlutterBuildDebug'
Gradle build failed
Cause
Possible reasons include:
- corrupted Gradle cache
- incompatible Gradle version
- network failure during dependency download
Solution
Clear Gradle cache:
Delete the folder:
C:\Users\username\.gradle
Then run:
flutter clean
flutter pub get
flutter run
This forces Flutter to rebuild dependencies.
6. Android Licenses Not Accepted
Error
Android licenses not accepted
Solution
Run:
flutter doctor --android-licenses
Accept all licenses by typing y.
7. Emulator Not Detected
Error
No connected devices
Cause
Flutter cannot detect an Android emulator or physical device.
Solution
Option 1: Start Android Emulator
Open Android Studio → Device Manager → Start Emulator.
Option 2: Connect Physical Device
Enable:
Developer Options
USB Debugging
Then run:
flutter devices
8. Flutter SDK Outdated
Error
Flutter version is outdated
Solution
Update Flutter SDK:
flutter upgrade
Then verify with:
flutter doctor
Updating Flutter also updates the bundled Dart SDK.
Read : How to Update Flutter SDK (Step by Step Guide for Developers)
9. Pub Get Failed Error
Error
pub get failed
Cause
- network problems
- corrupted dependencies
- incorrect package versions
Solution
Run:
flutter clean
flutter pub get
If the problem persists:
Delete:
pubspec.lock
Then run:
flutter pub get
again.
10. VS Code Flutter Extension Not Detecting SDK
Error
VS Code shows:
Flutter SDK not found
Solution
Set SDK path manually in VS Code.
Go to:
File → Preferences → Settings
Search:
Flutter SDK Path
Add:
C:\src\flutter
Restart VS Code.
11. Flutter Build APK Fails
Error
Failed to build APK
Possible Causes
- incompatible Gradle
- outdated plugins
- corrupted dependencies
Solution
Run:
flutter clean
flutter pub get
flutter build apk
If still failing, upgrade Flutter:
flutter upgrade
12. Path Issues with Multiple Flutter Installations
Cause
Sometimes developers install Flutter multiple times.
Example:
C:\flutter
C:\src\flutter
D:\tools\flutter
This causes PATH conflicts.
Solution
Ensure only one Flutter SDK path exists in environment variables.
Check path:
where flutter
Remove duplicate entries.
Best Practice to Avoid Flutter SDK Errors
To prevent common errors after installing Flutter SDK, follow these best practices:
Always run Flutter Doctor
flutter doctor
This command diagnoses environment issues.
Read : Flutter Doctor command — What is flutter doctor (2026 Complete Guide)
Keep Flutter Updated
flutter upgrade
Avoid Multiple SDK Installations
Maintain one stable Flutter installation.
Use Stable Channel
Check Flutter channel:
flutter channel
Switch to stable:
flutter channel stable
flutter upgrade
Use Compatible Android SDK
Ensure Android SDK platform tools are updated.
Recommended Flutter Development Setup
A stable Flutter development environment usually includes:
- Flutter SDK (latest stable)
- Android Studio
- VS Code with Flutter extension
- Android SDK Platform tools
- Emulator or physical device
- Updated Gradle
This setup ensures fewer configuration problems and smoother builds.
Conclusion
Facing common errors after installing Flutter SDK is a normal experience for many developers, especially beginners setting up their environment for the first time. Most of these problems occur due to missing dependencies, incorrect environment variables, outdated tools, or SDK configuration issues.
Fortunately, Flutter provides powerful diagnostic tools such as flutter doctor that make troubleshooting easier. By carefully checking system requirements, setting the correct paths, installing Android SDK components, and keeping Flutter updated, developers can quickly resolve most installation errors.
Understanding these issues and their solutions helps create a stable development environment, allowing you to focus on building high-quality Flutter applications instead of struggling with configuration problems.
Frequently Asked Questions (FAQ)
One of the most common errors after installing Flutter SDK is the “flutter command not recognized” issue. This happens when the Flutter SDK path is not added to the system environment variables.
Solution
Add the Flutter SDK bin folder to your PATH.
Example:
C:\src\flutter\bin
After updating the PATH, restart the terminal and run:
flutter doctor
When running flutter doctor, you may see warnings related to the Android toolchain.
Example:
Android toolchain – develop for Android devices
✗ Android SDK not found
Solution
Install Android Studio and Android SDK, then run:
flutter doctor –android-licenses
Accept all licenses and verify the setup again.
Flutter Doctor checks the entire development environment, not just the Flutter SDK. Even if Flutter is installed correctly, the command may still show warnings if dependencies such as Android Studio, device drivers, or SDK tools are missing.
Recommended Fix
Install and configure the following tools:
Android Studio
Android SDK Platform Tools
Device emulator or physical device
Accept Android licenses
Then run:
flutter doctor
again to confirm the setup.
Gradle build failures usually occur due to corrupted cache files, outdated dependencies, or network problems while downloading packages.
Solution
Run the following commands:
flutter clean
flutter pub get
flutter run
If the problem persists, delete the .gradle cache folder and rebuild the project.
Flutter includes its own Dart SDK. If another Dart SDK is installed globally, conflicts may occur during compilation.
Solution
Check the Dart version used by Flutter:
flutter dart –version
Avoid manually overriding Dart SDK paths unless necessary.
If Flutter cannot detect an emulator or physical device, you may see:
No connected devices
Solution
Start an emulator from Android Studio:
Tools → Device Manager → Start Emulator
Or connect a physical device and enable:
Developer Options
USB Debugging
Then run:
flutter devices