

Mock API Playground for Flutter Developers: What It Is and How to Use It Step by Step
APIs are one of the most important parts of modern app development. Whether a developer is building a Flutter e-commerce app, a blog app, a task manager, an admin dashboard, or a portfolio project, they almost always need to fetch or send data from an API. Products, users, comments, login systems, order history, analytics, notifications, and dashboards all depend on API communication.
For beginners, however, API integration often feels difficult. Many new developers do not understand where requests are sent, how endpoints are built, what headers do, why request bodies are needed, or how JSON responses should be handled inside an application. This is exactly where a Mock API Playground becomes extremely useful.
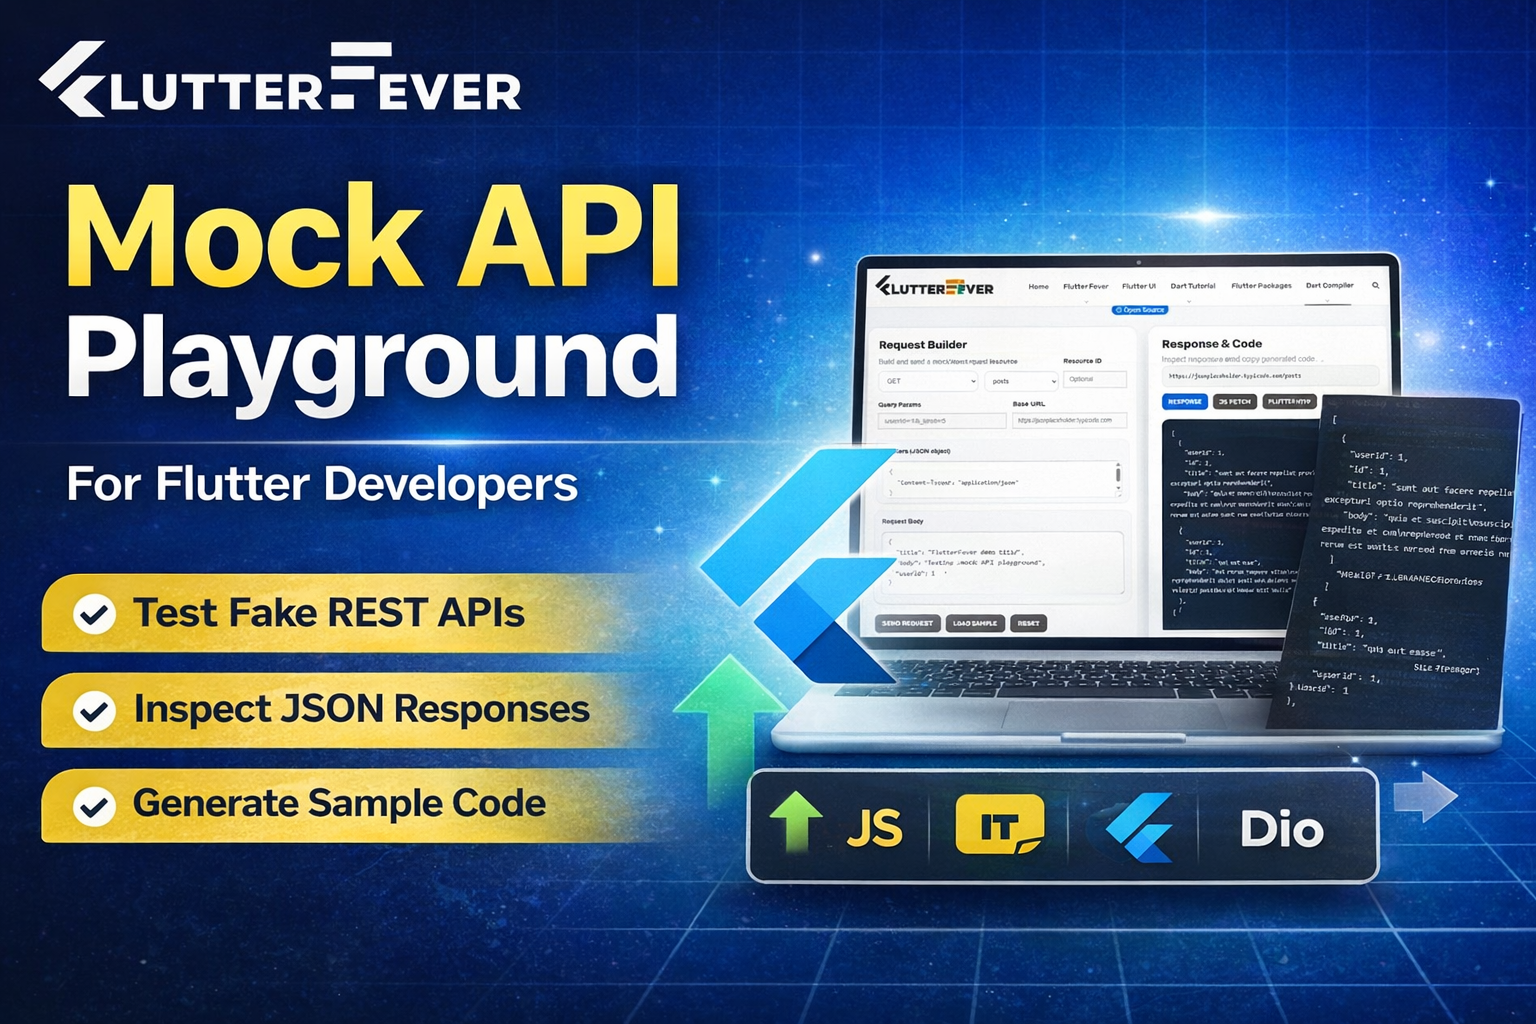
The FlutterFever Mock API Playground is a beginner-friendly online tool built to help developers test fake REST APIs, inspect JSON responses, and understand how API requests work in real applications. It is designed for learning, practice, experimentation, and practical implementation. Instead of depending on a real backend, users can safely send API requests to mock endpoints and understand the full request-response workflow in a visual and structured environment.
This article explains what the Mock API Playground is, who it is for, how it works, and how to use it step by step.
What Is a Mock API Playground
A Mock API Playground is an online testing environment where developers can work with fake or sample APIs in a safe and controlled way. It lets users build requests, choose HTTP methods, add parameters, include headers, send request bodies, and inspect JSON responses without needing access to a real production backend.
In simple terms, it works like a practice lab for API learning.
Instead of setting up a backend server or searching for complex real-world APIs, developers can use a fake REST API and immediately start learning how requests and responses behave. This makes the Mock API Playground especially useful for students, beginner Flutter developers, frontend developers, tutorial creators, and anyone who wants to understand API integration more practically.
The FlutterFever tool is not just a response viewer. It is a complete API learning and testing workspace. It helps users understand request methods such as GET, POST, PUT, PATCH, and DELETE while also showing the response clearly and generating starter code for JavaScript Fetch, Flutter http, and Flutter Dio.
Read : Dio Package in Flutter – Features & Use Cases (2026 Guide)
Why the Mock API Playground Matters for Flutter Developers
A Flutter developer works with APIs very frequently. Most real apps need some kind of remote data source. Even a simple Flutter app may fetch blog posts, user profiles, product lists, categories, comments, or notifications from an API. Because of this, learning API integration is not optional. It is one of the core skills in Flutter development.
The problem is that beginners often start with too much complexity. Real APIs may require authentication, API keys, complex validation, environment setup, backend documentation, and error handling. This can slow down learning and create confusion.
A Mock API Playground solves that problem by giving developers a simple place to practice.
It helps Flutter developers understand the difference between HTTP methods. It makes JSON responses easier to inspect. It reduces dependency on backend setup. It helps users move from theory to implementation faster. Most importantly, it builds confidence because developers can see the response, understand the structure, and directly explore how the same request can be written in Flutter code.
For Flutter beginners, this learning bridge is extremely valuable.
Who Should Use This Tool
The FlutterFever Mock API Playground is useful for a wide range of users.
It is ideal for beginner Flutter developers who are just starting API integration. It is useful for students learning REST API concepts for the first time. It is also helpful for frontend developers who want to inspect JSON responses and understand endpoint behavior. Mobile app developers, JavaScript learners, coding bootcamp students, tutorial creators, and developers building demo apps can all benefit from this tool.
Anyone who wants to practice API requests in a safe environment can use it.
What Problem This Tool Solves
Most beginners struggle with the same API-related questions:
- What is an endpoint
- How is a request built
- What is the difference between GET and POST
- Why are headers used
- What does a JSON response look like
- How do query parameters work
- How do request bodies work
- How do Flutter apps consume API responses
The Mock API Playground solves these problems by letting users learn visually and interactively.
Instead of only reading theory, users can build a request, send it, and inspect the result. That changes the learning experience completely. It makes REST API concepts much easier to understand because the user can see the workflow in action.
Key Features of the FlutterFever Mock API Playground
The FlutterFever Mock API Playground is designed to combine learning with practical testing. It includes the most useful elements developers need when practicing API requests.
1. Request Method Selection
Users can select common REST API methods such as:
- GET
- POST
- PUT
- PATCH
- DELETE
This helps beginners understand how different request types behave.
2. Resource and Endpoint Builder
The tool allows users to choose resources such as posts, users, comments, or todos without manually typing every endpoint from scratch. This makes the interface much easier for beginners.
3. Resource ID Support
If the user wants to fetch a specific item, they can add a resource ID. This helps in understanding endpoint paths more clearly.
4. Query Parameters Input
Users can test filtered requests and limited responses by adding query parameters. This is important for learning how APIs return specific or filtered data.
5. Headers Editor
The tool supports custom request headers in JSON format. This allows users to understand request metadata and how headers are structured.
6. Request Body Editor
For POST, PUT, and PATCH requests, users can send JSON payloads through the request body section. This helps them learn how data is submitted to an API.
7. Response Viewer
The API response is displayed in a structured JSON format so users can inspect arrays, objects, keys, values, and data flow more comfortably.
8. Copy and Download Options
Users can copy the response or download it for later practice and analysis.
9. Code Generation for Developers
One of the strongest features of the tool is that it provides starter code examples for:
- JavaScript Fetch
- Flutter http
- Flutter Dio
This helps users move from API testing to real implementation much faster.
How the Mock API Playground Works
The Mock API Playground follows a simple and practical request-response flow.
The user starts by selecting the request method. Then they choose the API resource they want to interact with. If needed, they can add a resource ID. They can also enter query parameters, headers, and request body content. Once the request is ready, they click the send button. The tool processes the request and displays the response in JSON format. After that, the user can inspect the result, copy it, download it, or generate starter code for implementation in JavaScript or Flutter.
This workflow makes the tool suitable not just for testing, but for actual learning.
Step-by-Step Guide: How to Use the Mock API Playground
Now let us look at how to use the tool step by step in a beginner-friendly way.
Step 1: Open the Mock API Playground
Go to the FlutterFever website and open the Dev Tools section. From the dropdown, choose Mock API Playground.
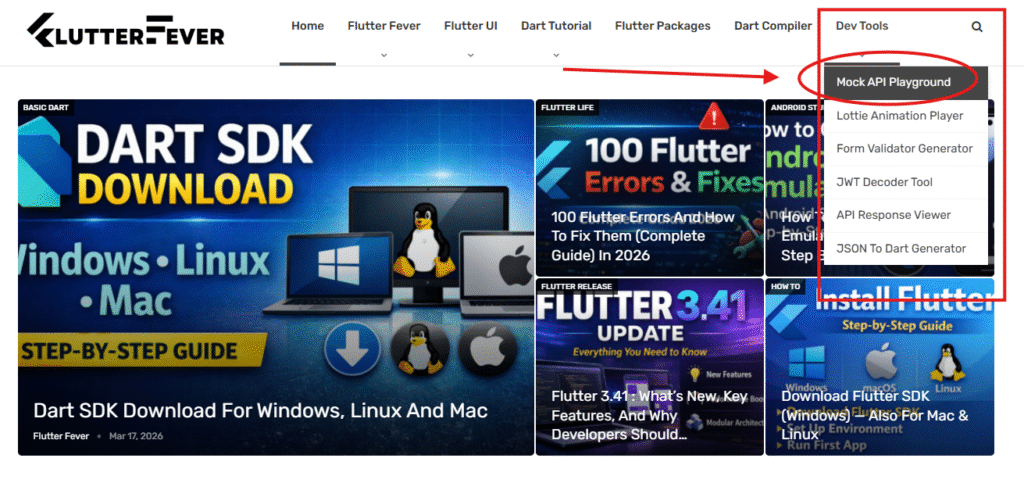
This will open the API testing interface where you can build and send requests.
Step 2: Choose the Request Method
In the request builder, first select the request method. You will usually see options such as GET, POST, PUT, PATCH, and DELETE.
- If you want to fetch data, choose GET.
- If you want to create data, choose POST.
- If you want to update existing data, choose PUT or PATCH.
- If you want to remove data, choose DELETE.
Base Url : you can use your base url or for sample ( JSON Place holder use )
For beginners, GET is the best method to start with.
Step 3: Select a Resource
After choosing the method, select a resource such as:
- posts
- users
- comments
- todos
A resource is the collection or category of data you want to work with.
For example, if you choose posts, the tool will target a posts endpoint.
Step 4: Add a Resource ID if Needed
If you want data for a specific item, enter a resource ID.
For example:
- posts with ID 1
- users with ID 2
If you leave the resource ID empty, the API may return the full collection instead of a single item.
Step 5: Add Query Parameters
Query parameters are used when you want filtered or limited data.
For example, you may add:userId=1&_limit=5
This tells the API to return a smaller filtered set of results. Learning query parameters is important because real applications use them frequently for filtering, searching, sorting, and pagination.
Step 6: Review or Update the Base URL
The tool usually includes a preconfigured base URL for a fake REST API source. Beginners can leave it as it is while practicing.
This helps users understand the difference between base URL and endpoint path.
Step 7: Add Request Headers
The headers section allows you to send request metadata in JSON format.
For example:
{
  "Content-Type": "application/json"
}
This is especially useful when sending JSON body data in POST, PUT, or PATCH requests.
Step 8: Add Request Body for POST, PUT, or PATCH
If you are creating or updating data, enter a JSON payload in the request body section.
Example:
{
  "title": "FlutterFever demo title",
  "body": "Testing mock API playground",
  "userId": 1
}
This helps users understand how request body data is structured.
Step 9: Click Send Request
Once your method, resource, parameters, headers, and body are ready, click the Send Request button.
The tool will process the API call and display the output.
Step 10: Inspect the JSON Response
After sending the request, the response viewer will show the result in JSON format.
This is where the real learning happens.
Study the structure carefully. Notice how objects and arrays are organized. Observe how fields like id, title, body, or userId appear. This is the same kind of data you will later parse inside Flutter apps.
Step 11: Copy or Download the Response
You can copy the response for quick testing or download it for later use. This is useful when building sample apps, practicing JSON parsing, or generating models.
Step 12: Generate Sample Code
One of the best parts of the FlutterFever Mock API Playground is that it generates starter code examples.
You can switch between:
- Response
- JS Fetch
- Flutter http
- Flutter Dio
This helps you understand how the same API request can be implemented in actual code.
For a Flutter beginner, this is extremely powerful because it directly connects the visual request builder with real Flutter coding workflow.
How This Tool Helps Beginners Learn Faster
Beginners often read API tutorials without fully understanding how APIs actually work. The Mock API Playground changes that by making API learning interactive.
It turns theory into practice. Instead of imagining how a GET request should behave, the user can send one. Instead of guessing what a JSON response looks like, they can inspect it live. Instead of struggling to write code from scratch, they can copy starter code and learn from it.
This creates a much stronger learning cycle:
- understand the request
- test the endpoint
- inspect the JSON response
- copy the sample code
- implement it in a Flutter app
That is why this tool is especially valuable for self-learners and beginners.
How This Tool Helps Flutter Developers in Real Projects
Flutter developers can use this Mock API Playground in many practical ways.
It helps them test endpoints before integrating them into an app. It improves their understanding of JSON response structure. It allows them to compare implementation between the Flutter http package and Dio. It also helps in building practice apps like blog apps, todo apps, product viewers, profile screens, admin dashboards, and learning projects.
A Flutter developer can test the endpoint here first, understand the response, and then move to Flutter implementation with more confidence.
Real Use Cases of the Mock API Playground
The Mock API Playground is useful in many realistic scenarios.
A student can use it to learn REST API basics. A beginner Flutter developer can use it to practice network calls before building a real app. A frontend developer can inspect JSON structures for demo projects. A tutorial creator can use it to explain API methods visually. A junior developer preparing for interviews can use it to strengthen practical understanding of request and response flow.
It is also useful for teams building frontend screens before the real backend is ready.
Why This Tool Is Better Than Only Reading Documentation
Documentation is essential, but for many beginners it is not enough. Reading endpoint descriptions is very different from actually sending a request and seeing a response.
The Mock API Playground provides interactive learning. That makes the experience more practical, more memorable, and more useful for real implementation. Instead of only reading about request methods, users can try them. Instead of only seeing example JSON in documentation, they can generate and inspect it themselves. Instead of only studying code snippets, they can understand the request workflow that those snippets represent.
This makes the learning process faster and more effective.
Best Practices for Using a Mock API Playground
To get the most value from this tool, developers should follow a few simple best practices.
Start with GET requests and understand basic response structure first. Then move to POST, PUT, PATCH, and DELETE to understand how data creation and updates work. Always inspect the JSON response carefully and observe arrays, nested objects, and data fields. Compare the generated JavaScript Fetch, Flutter http, and Flutter Dio code examples. After testing an endpoint, try using the same endpoint inside a small Flutter project. Finally, combine this tool with a JSON to Dart model generator for an even better workflow.
Why the FlutterFever Mock API Playground Is Valuable
The FlutterFever Mock API Playground is more than a simple API viewer. It is a practical learning tool, an API testing workspace, and a bridge between beginner knowledge and real Flutter implementation.
For developers who want to understand APIs better, practice safely, and move faster in app development, this tool provides a clean and structured environment. It reduces confusion, encourages experimentation, and supports hands-on learning. That makes it especially useful for new developers who want to gain confidence with API integration.
Suggested Links
Conclusion
The Mock API Playground is one of the most useful tools for developers who want to learn and practice API integration in a safe and beginner-friendly environment. It helps users test fake REST APIs, inspect JSON responses, understand HTTP methods, and generate starter code for JavaScript and Flutter.
For Flutter developers, this is especially valuable because APIs are a core part of mobile app development. Instead of struggling with a real backend too early, they can first understand how requests work, how responses look, and how Flutter code connects to that workflow.
If you want to learn REST APIs, practice safely, understand JSON better, and improve Flutter API integration skills, the FlutterFever Mock API Playground is a strong place to start.
The FlutterFever Mock API Playground helps beginners and Flutter developers test fake REST APIs, inspect JSON responses, and generate starter code for Flutter http and Dio in a practical learning environment.
Quick How to Use Summary
- Open the Mock API Playground from FlutterFever Dev Tools.
- Choose the request method.
- Select a resource like posts, users, comments, or todos.
- Add a resource ID if needed.
- Enter query parameters.
- Add request headers.
- Add request body for POST, PUT, or PATCH.
- Click Send Request.
- Inspect the JSON response.
- Copy or download the result.
- Generate JavaScript Fetch, Flutter http, or Flutter Dio code.
Main Benefits
- Helps beginners learn APIs faster
- Safe fake REST API testing
- Useful for Flutter developers
- Easy JSON response inspection
- Practical request method learning
- Supports headers, body, and query params
- Generates starter code instantly
- Great for demo apps and portfolio projects
FAQs
A Mock API Playground is an online tool that allows developers to test fake REST APIs, build requests, inspect responses, and practice API integration without needing a real backend.
Yes, it is very useful for Flutter developers because Flutter apps frequently depend on APIs. This tool helps developers understand requests, responses, JSON structure, and implementation workflow.
Yes, the tool is beginner-friendly. It is built to help new developers understand API basics such as request methods, endpoints, headers, request bodies, and JSON responses.
A fake REST API tester gives developers a safe learning environment. They can practice API integration, inspect JSON responses, and understand request flow without touching production systems.
Yes, the tool provides starter code examples for Flutter http and Flutter Dio, along with JavaScript Fetch. This makes it easier to move from testing to implementation.
Using a Mock API Playground first helps you understand the structure of API requests and responses. It builds confidence and reduces confusion before you start working with real production APIs.